April 30, 2009 (coordinator training)
How to Login and Post an Alert
Quick Reference
Login: Under the “Meta” menu heading (lower right), click “log in”. Enter your assigned User ID and Password and press the “Log In” button (presents the “Dashboard”) – If you need a User ID, contact Larry Owens.
Post: In the upper left, click “Posts”, then “Add New” (presents the editor screen)
Enter Text: Enter the title of your alert in the title box, and enter the text of your post in the larger box below.
Preview Post: Click the “Preview” button to see how your post will appear on the website.
Publish: When you’re satisfied with the appearance of your post, press the “Publish” button. Your post now goes out over the ALPO social networks, Yahoo groups and to your section website under “Alerts”.
Important note about your text: The first line of text in your post should contain the date (use font “Heading 3″). The second line should repeat the title that you entered in the title box (use font “Heading 1″). Start the text of your alert on the 3rd line (use font “Paragraph”) – Font settings are available in the toolbar just above the text window.
.
More Information
What is a Blog?
Before we get started, lets get an understanding of how a “blog” differs from a regular website (your WordPress system can be used to create both). A “blog” is basically a website that maintains a continuous rolling log of text and images that are posted by authorized users with simple posting tools built in to the website. Each post in the blog is titled, automatically dated, categorized and marked with the poster’s name. The most recent posts appear at the top, with a long list of posts below, that you can read by smiply scrolling downward. In addition to that, the titles of each post are automatically placed in a menu for easy reference in the right margin of the blog, and as the number of posts grows, they are automatically archived to keep your blog a manageable size. You can use the search feature or an archives menu to quickly find older posts. Also, each individual blog post is automatically assigned it’s own web address, which can be included in emails or group posts. Unregistered users can be permitted to submit “comments” to each blog post. Comments are also processed and archived like posts, but comments are linked to specific blog posts.
The admin and publishing pages of WordPress frequently refer to “Pages” and “Posts”. As you move through your system’s administration pages, keep in mind that a “Post” is a blog entry. Our system also allows registered users to publish regular (non-blog) web pages on the site, and this is referred to as publishing a “Page”.
As a section coordinator or associate, you’ll primarily be creating blog “Posts” and publishing web “Pages”. The rest of the admin functions should probably be left to the webmaster (this just depends on your comfort level – your ID can be granted full authority if desired).
Section coordinators should use blog “Posts” to publish special alerts or observations with text and images, and use “Pages” (static web pages) to build a section website with links and documents if desired (if you like your current section website, you may certainly continue to use it along with the blog).
Log in to the Blog
Before alerts can be posted on your section’s blog, an ID and Password are necessary. Contact Larry Owens larry.owens@alpo-astronomy.org for ID’s (section coordinators and associates only).
To login, simply access the section’s blog (web addresses for each section are here) and look for “Log in” in the “Meta” menu on the right side of the page. Once “log in” is clicked, the WordPress login screen should appear.
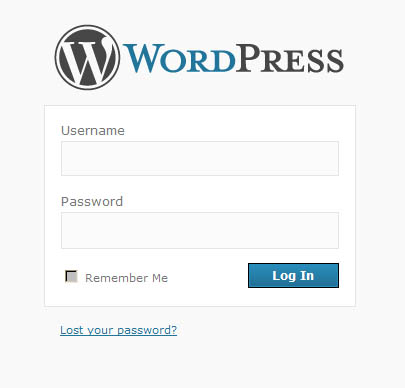
After successfully entering a valid user ID, password and clicking the login button, the main administration page of the site should appear. This page is only visible to registered users, and can be used to create new blog posts, create web pages and administer the various options of the site. Lets take a look at the main admin page or “dashboard” now.
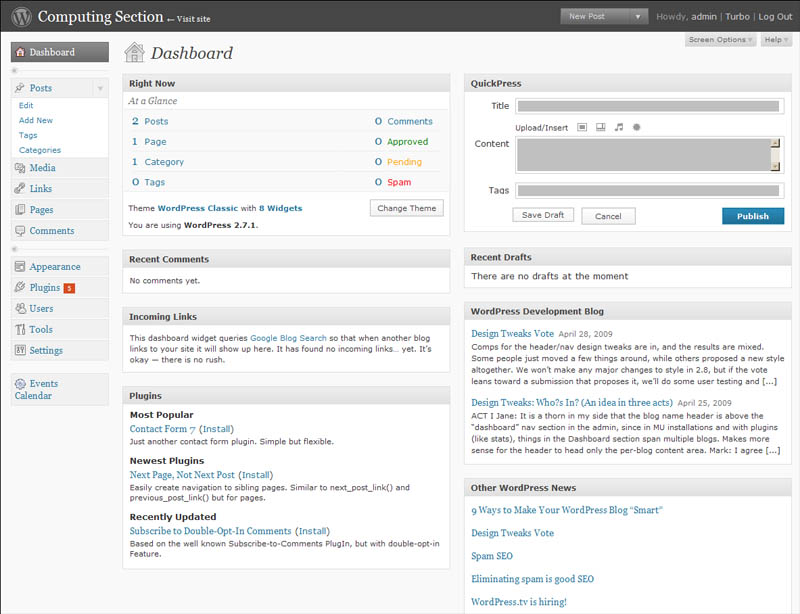
For now, lets concentrate on the menu on the left of the page under the word “dashboard”. The first item is “Posts”. You would use this menu item to make a post to the blog. You’ll notice several sub-menu selections under “Posts”, including “Edit”, “Add New”, “Tags” and “Categories”. These are options related to posting. If the sub-menus don’t appear, just click on the main menu item to see them.
Adding a Blog Post
Since posting is the most frequently used function, there are several ways to make a post. You can either click “Add New” under “Posts” on the dashboard menu, you can click “New Post” in the gray area in the upper right of your screen, or you can use “Quick Press” to publish a quick blog post. Pressing either “Add New” or “New Post” should present the following page:
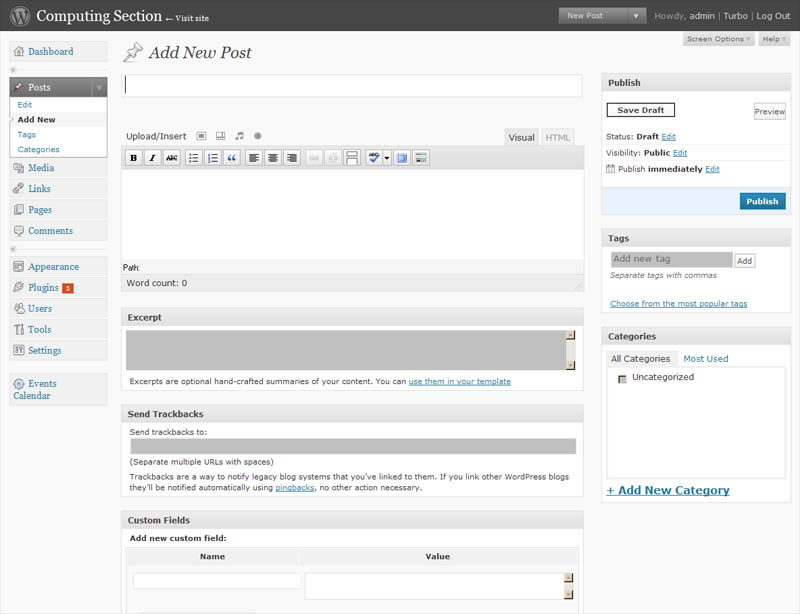
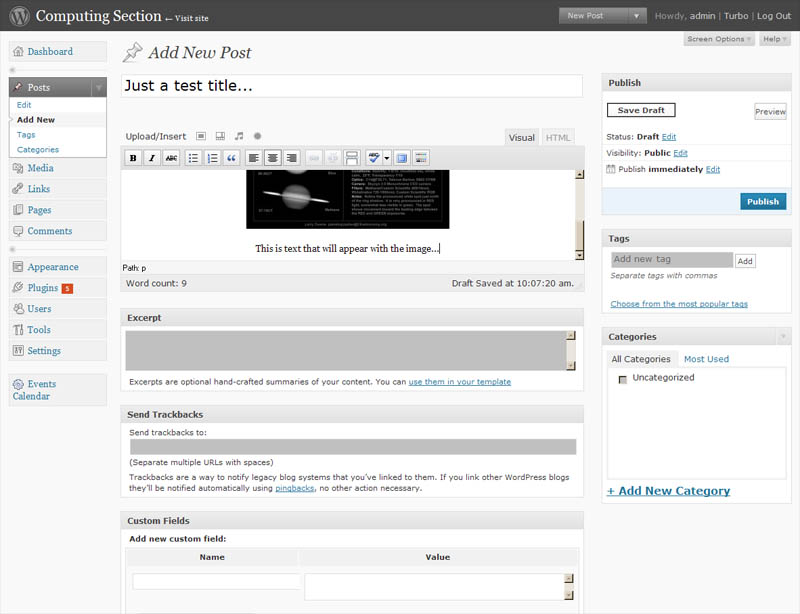
Directly under the words “Add New Post” is a narrow box for entering a title for your blog post. Keep in mind that you may want to search for this post in the future, so be descriptive. The larger box below several icons is where the text of the post is entered and edited. Images may also be uploaded and inserted with the text here.
Over the larger text box, several icons appear. Moving your mouse curson over each icon will present a short description. These icons can be used to control text alignment and some other basic functions. If you wish to change the text size and color, there is a second hidden row of icons that provide additional features. To reveal these icons, click the “show/hide kitchen sink” icon (at the very end). Additional formatting options include text size and color, inserting links and others.
In the upper right under the “Publish” heading are options for saving a draft of your post, previewing the post, and publishing the post to the website, making it public.
Adding an Image to the Post
After a title and some text is entered, it’s often desirable to insert an image. There are several ways to do this, but the most common method is to upload an image from your PC. To do this, place your cursor where the image is to appear in the text and click the small square icon just to the right of “Upload/Insert”, above the text entry box (“Add an Image” should appear when your mouse cursor is placed over it). Clicking this icon, should present the following screen:
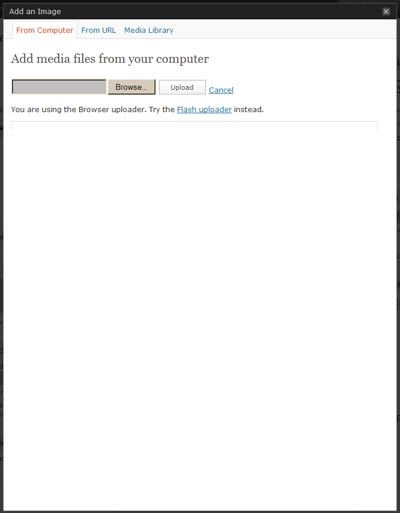
There is also a “Flash uploader” that may appear on some PC’s but they work the same. To select an image, press the “Browse” button and navigate you local file system to locate the image you wish to insert.
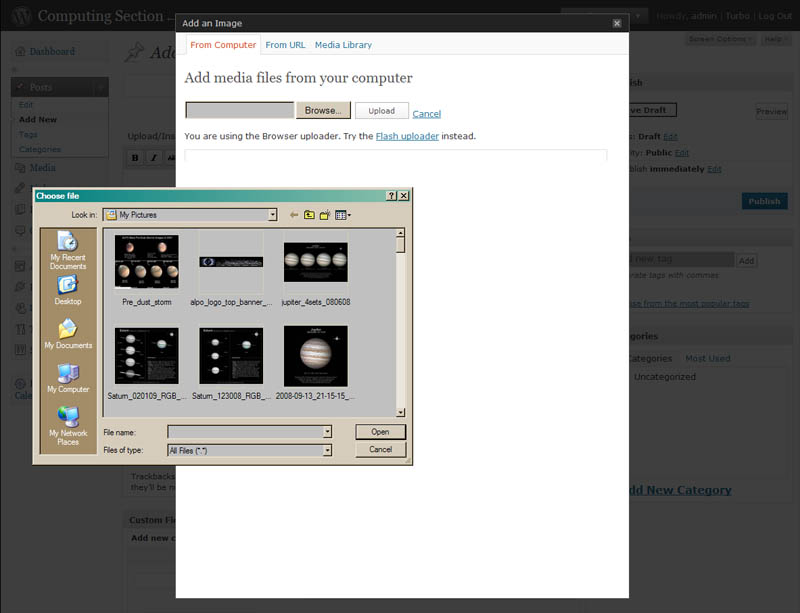
Pressing “Open” starts the upload process, and when the upload is complete the following screen should appear:
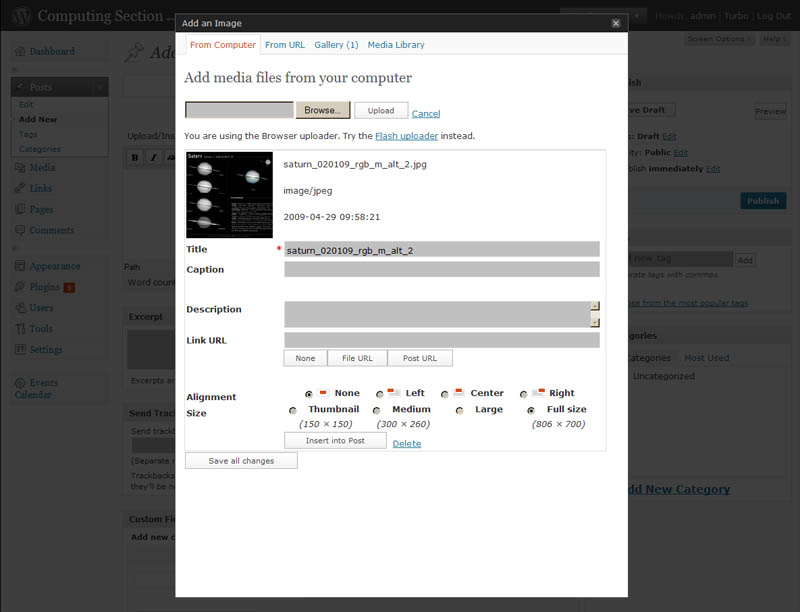
At this point you have several options. Of special interest is “Alignment” and “Size”. The alignment radio buttons determine how the image will be positioned on the page, and the size options allow the image to be re-sized before placement in your post. To make the image a link (when the image is clicked, a full size version of the image or another website is presented), select a smaller size such as “Medium” or “Thumnail”, and enter the URL in the “Link URL” box. A caption and description may also be entered for the image.
To place the image in your post, click “Insert into Post”. Another option is to click “Save all changes”. This will place the image in the media library for future use, but will not insert the image into your post, unless you select “Insert from Media Library”.
Preview and Publish
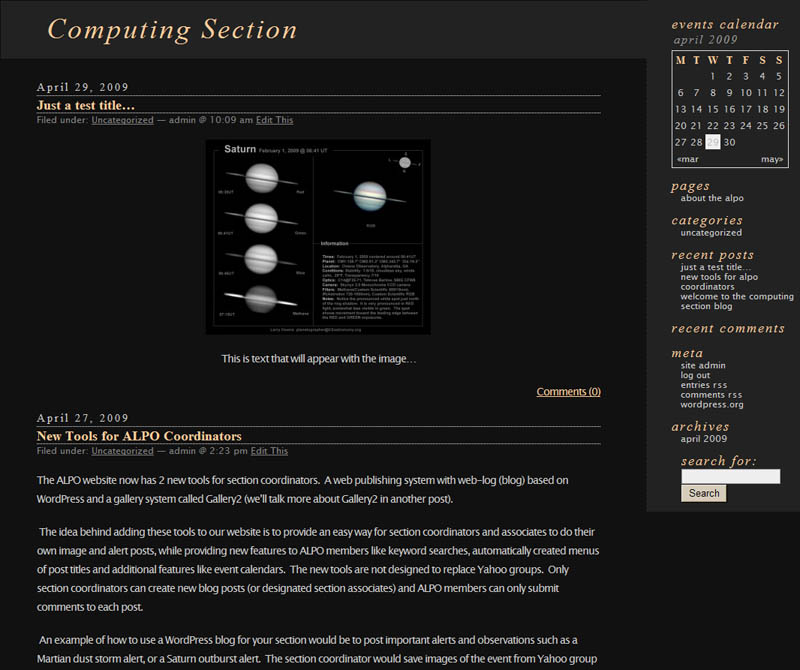
To see if the post appears as expected, the “Save Draft” button can be pressed. When a message appears at the top of the page indicating that the draft has been saved, a press of the “Preview” button should present the post as it will appear on the website. If all is well, pressing the blue “Publish” button will publish the post to the webiste.
Edit or Delete the Post
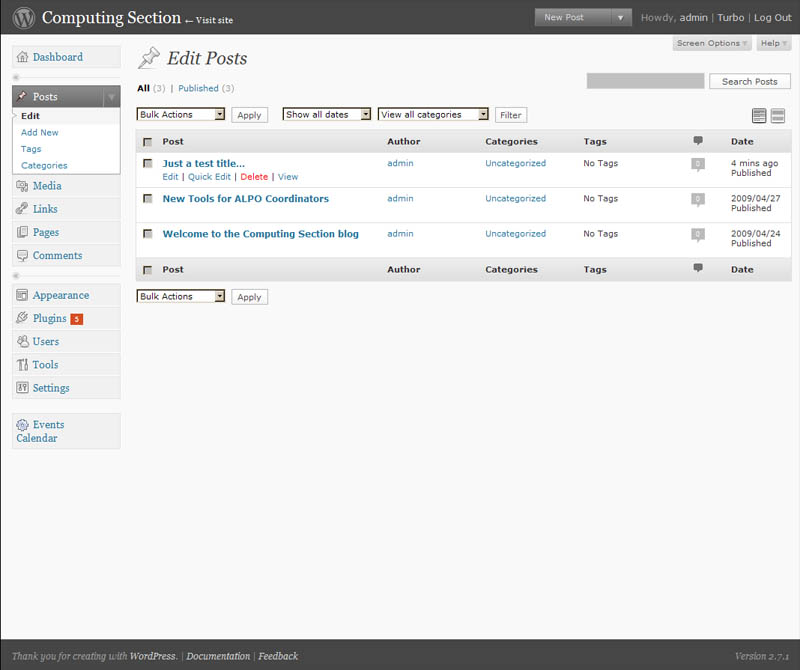
If you see something after the post is published that needs to be changed, it’s easy to edit. There is a convenient “Edit This” link at the top of the post (available only to the poster when logged in). It’s also possible to return to the dashboard and click “Edit” under “Post” in the upper left. A list of posts should appear and moving the mouse cursor over each title should present additional options for that specific post (Edit|Quick Edit|Delete|View). Editing or deleting the post is a simple matter of clicking the appropriate option.
There is much more to WordPress, but this should be a good start. In fiture posts I’ll discuss how to post static web pages.
If you run into problems, please contact Larry Owens larry.owens@alpo-astronomy.org .
Thanks,
Larry


