|
Observe Eclipses!
|
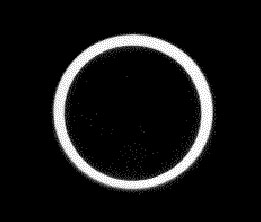
Solar Eclipse Observing--The Partial PhasesIntroduction. The partial phases of a total, annular–total or annular eclipse of the sun, as well as partial solar eclipses themselves, offer a number of interesting projects that can be conducted with modest equipment. Contact timings. Accurate timings of the moon’s contacts with the solar limb may be carried out by pinhole projection, eyepiece projection with binoculars or telescopes, or direct viewing through safe solar filters with naked–eye, binoculars, camera lenses or telescopes.
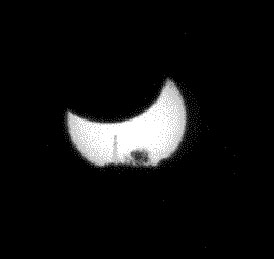
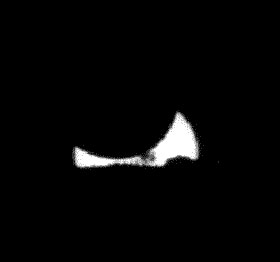
First contact is the instant when the moon’s limb is initially seen encroaching on the solar disk. This is the most difficult contact to time, since you must anticipate where the moon will first appear against the sun’s limb. Fourth contact, when the moon leaves the sun, is easier to time since the observer can anticipate the event with considerably greater certainty. The best timing method is to tape record your voice comments over short–wave radio time signals. From North America, the National Institute of Standards and Technology broadcasts time signals over radio station WWV from Fort Collins, Colorado (WWVH from Hawaii) on frequencies of 2.5, 5, 10, 15, and 20 MHz. Similar signals may be received on frequencies of 3.330, 7.335, and 14.670 MHz over radio station CHU from Ottawa, Ontario, Canada. An increasingly popular alternative method is to video tape the sun’s actual or projected limb while the camcorder records the radio time signals as audio. Subsequent playbacks, with the aid of a stopwatch, can effectively eliminate timing errors brought on by failure to visually spot the encroaching moon at the earliest possible moment. If you are unable to receive radio time signals in the field, a wristwatch, checked for accuracy shortly before and as soon after the eclipse as possible, will suffice. Be certain to record, along with your timings, an estimate of their accuracy (i.e., “to the nearest 0.1 minute”) for later reference. In addition to noticing differences in the precision with which you time first contact and fourth contact, you should also notice a significant difference in timings done by observers at the same site using different types of equipment. An interesting study is to compile and graph data on various observers’ timings of each contact against their methods and/or the diameters of the instruments they used. Such studies must be conducted with some care, however, to prevent observers located too closely together from influencing one another’s judgments as to when contacts are actually seen. Sunspot contact timings. Timings of contacts of the moon’s limb with individual sunspots or sunspot groups are especially interesting. Observers with access to short–wave radios can make fairly accurate timings of such contacts. Others, having stopwatches or wristwatches, can accurately time how long it takes for a sunspot or group to be covered. The angular velocity of the moon in its orbit about the earth averages 33 minutes of arc (written 33’) per hour, or 0.55’ per minute of time. Since the sun’s angular diameter averages 32’ the moon should appear to sweep across the sun’s visible disk in 58 minutes. Since the sun’s diameter is 1,391,000 km (864,400 mi), in order to cover that diameter in 58 minutes, the moon must sweep across some 400 km (257 mi) of the sun’s face each second. Of course, this blatantly neglects the substantial effect of the sun’s limb curvature. Still, for sunspots close to the center of the solar disk and for a lunar passage that is nearly central, it is possible to make reasonable estimates of the diameters of sunspots and sunspot groups from the number of seconds it takes the moon’s limb to obscure them. Limb irregularities. Some observers have recorded seeing irregularities or deformities on the lunar limb as it moves across the sun. Whether such irregularities represent actual mountains and valleys on the lunar surface, illusions caused by the contrast between the moon and the sun, or simply atmospheric disturbances is debatable. However, they are worthy of note, especially if their appearance times and their actual compass position angles or their locations with respect to nearby sunspots are recorded for later comparison with observations by others. Photographic projects. Partial eclipses lend themselves to several interesting photographic effects. There are, of course, the obvious targets already described. Frequent and accurately timed exposures around first and fourth contacts make impressive sequences allowing contact timings to be extrapolated. High–quality camcorder video, with radio time–signals on the audio track, can be reduced later to yield precise contact timings. Photographing the stages of lunar encounters with sunspots and attempting to image any limb irregularities should also be tried. But there are other worthwhile photographic projects that have no observational counterparts.
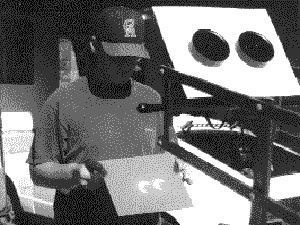
A camera capable of multiple exposures on a single frame may be centered on the sun’s expected position at mid–eclipse (keep in mind that the sun moves about 15 degrees each hour). If multiple exposures are taken at intervals of five to ten minutes, the resulting photograph will show the progression of the partial eclipse stages across the frame. Practicing this technique a few weeks before the eclipse will insure the best combinations of exposure interval, shutter speed, f–stop and lens for the film you’ve selected. A similar effect can be obtained with video camcorders capable of shooting time–lapse sequences; if exposures are frequent enough, the sun will appear to sweep across the sky while the eclipsed portion first grows then shrinks. Mounting the camcorder on a clock–driven telescope mount will freeze the sun’s motion across the sky while animating the eclipse stages, allowing use of telephoto lenses. Still cameras may also be used to take time exposures of the sun as it crosses the sky. The technique is similar to that used to produce star trails, but requires denser filtering than normal exposures would. The resultant streak of sunlight should decrease in width as mid–eclipse approaches, then increase again as the moon moves off the sun’s disk. For annular or total eclipses, you might want to interrupt the exposure around mid–eclipse, and snap a normal exposure of the eclipsed sun in the center of the streak path (remembering to appropriately reduce the filtering for an annular or remove it altogether for a total eclipse). Again, practice in advance of the eclipse! Finally, don’t neglect still and video photography of yourself, other observers around you, your site and the various equipment set–ups. Eyepiece projection of the partial phases or of annularity is as effective on someone’s T–shirt as it is on a projection screen; be creative! Such images add much to the overall eclipse experience.
|