Inspired by her photos, I switched to stacked web-cam technique for close-up photos of the sun. I began with a 640 X 480 resolution camera that was difficult to use and after several mediocre attempts I temporarily abandoned the effort for the easy, familiar digital camera. After neglecting the webcam for nearly a year, I finally put in the time and effort to figure out use of the camera and obtained some images that were better than I could get with the old technique. Still, the small field of view made it difficult to locate some of the small spots, and mirror shift of the Mak-Cass design interfered with focusing. I needed something easier to use with a wider filed of view.
I discovered the Orion StarShoot II with its 1280 X 1024 pixel dimension in the never-ending parade of Orion catalogues and decided that it would be worth a try. I had lunar photography in mind where the extra pixel dimensions translated into larger, more detailed images. To my surprise the camera was well-documented and much easier to use than my first webcam device. After seeing the results on the moon, I just had to try it on the sun and have been very happy with the results.
My solar photography setup is portable since I photograph at work during the weekdays. I keep the telescope, filters and imaging equipment in the trunk of my car ready to set up, shoot, take down and then hurry back to the office. I use a Meade ETX-125 with an Astrosolar Photofilm filter and take the whole-disk photos with a Nikon Coolpix 4300 camera while the computer boots up. (It is not possible to get a view of the whole solar disk with the StarShoot and the ETX-125.) When ready, I set the computer in a cardboard box to shield the display from sunlight and plug the Orion StarShoot II, with a W-15 yellow filter attached, into the USB port.
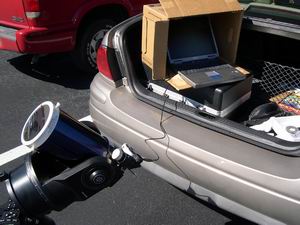 Figure 1 shows telescope set up for use at the work site and
 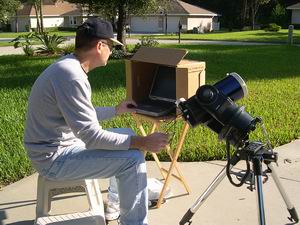 Figure 2 shows the setup in my driveway at home.
I center the spot with the eyepiece, then replace the eyepiece with the StarShoot II and focus if the spot is visible. If it is not, I focus on the limb of the sun and then locate the spot. Next I optimize the exposure, very carefully adjust the focus with the spot centered on the screen and then hit "expose." I usually expose for 60 seconds at 15 frames per second, but have gotten good results with 30 seconds when there was limited available disk space.
As time permits, I take several AVI files, especially when the seeing is marginal and it is difficult to get a good focus. Also, if the spot is near the limb, it is necessary to experiment with the exposure settings to get the best contrast.
The AVI frames are aligned and stacked with Registax 4. When the spot is in the central disk, it is usually easy to automatically align the images, but if it is near the limb, the automatic alignment tends to drift vertically, so the spot has to be aligned manually. This is not hard to do, and although it takes a few minutes for each processed file, it is well worth the effort. With a large spot group it is worthwhile to use multiple alignment points, but with a small spot or when the seeing is at its best, the single point alignment seems to do quite well.
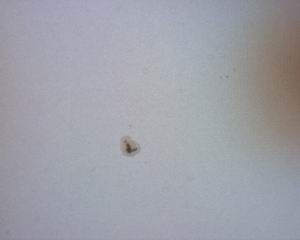 Figure 3 shows a single, unprocessed frame image from the AVI file.
Registax 4 usually picks from 20 to 100 acceptable frames for stacking from a 60 second AVI file. The limiting number of frames can be increased or decreased manually, however, if it appears that there are more good frames that have been excluded, or if it appears that some poor frames have been included. Once I am happy with the quality and number of the frame selection and I proceed to the "optimize and stack" function.
 Figure 4 shows the aligned and stacked image.
After the frames are optimized and stacked, the" wavelets" function is used to sharpen the image. This can make a huge difference in the resolution of the final image. Six levels of sharpening operate similarly to the "unsharp mask" function of Photoshop Elements, but at different pixel levels. I experiment with the settings and generally use lower numbers at the lower and higher wavelet levels and use higher numbers at the middle wavelet levels. I try to maximize the sharpening without inducing artifact and experiment with the settings until happy with the results, and then the image is saved.
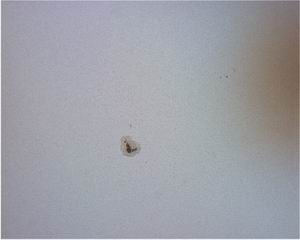 Figure 5 shows the image after processing with the wavelet function.
The final processing is done with Photoshop Elements II. First, I flip the image horizontally and rotate as needed so that north is up and east to the left on the image. Then the color image is converted to black and white and cropped to the desired size. I use "levels" to adjust the brightness and contrast and then add a touch of "sharpen" to bring out more details. (The unsharp mask function adds too much artifact at this stage.) Finally I tweak the photo with the "contrast" function and the image is ready for final presentation.
I add a narrow black boarder around the image and a broader boarder at the bottom of the photo. A label template has been created with the standard image format and daily data details are filled in. The label is transferred to the bottom of the image, and the spot number is added at the lower portion of the image. It is then ready to be saved and submitted.
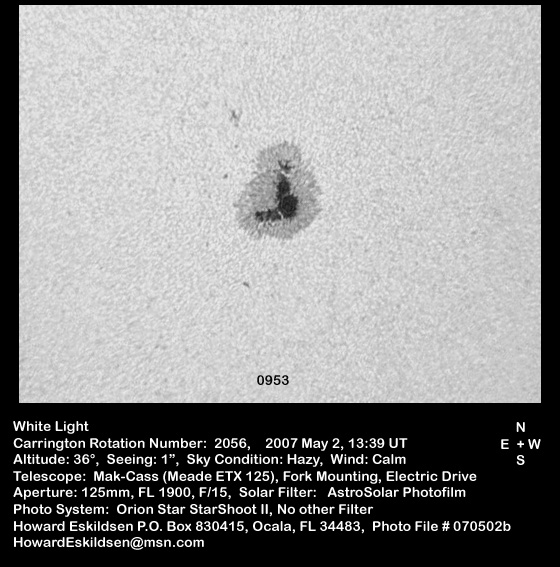 Figure 6 shows the final,labeled image.
I have been very happy with the results of the images taken with the Orion StarShoot II, both of the sun and the moon and planets. It has its quirks, but it is easy to use and has very good documentation. Other imagers are capable of excellent photos as well, and I would encourage anyone interested in getting detailed images of the sun, moon or planets to consider a webcam-style imager and stacking the photos with hardware and software of their choice.
Back to the main ALPO Solar Webpage